
A DNS, elaborated as a ‘Domain Name System’ cache is a log of every request a browser makes to a DNS server. The browser sends a request to the DNS server to obtain the IP address of a URL when users type it in.
The browser may then load the relevant website in the window once it has received the IP address. However, when a user tries to visit the page again, does the browser send out a fresh request?
No. To speed up future requests, the majority of operating systems cache IP addresses and several other DNS entries by default.
This is the cache for users’ DNS. Browsers can avoid making new requests and instead rely on the DNS cache by using stored data to load the page.
Hence, the website loads faster and server response times are decreased.
Why do users need to Flush DNS?
Flushing DNS will remove IP addresses and other DNS entries from the cache. Besides other problems, this can fix security and internet connectivity. The issue is that faulty results or potentially harmful IP addresses sometimes are cached and should be deleted.
Besides affecting connectivity, the DNS cache could lead to other problems. For whatever reason, users perform the “flushing DNS” process or clear this cache on all major operating systems.
It is important to note that, occasionally, the DNS cache will clear itself without users’ help. This is because the DNS cache stocks a piece of data known as TTL, or time to live, in addition to all the important information needed to identify and locate a website.
Why is Flushing DNS Essential?
There are several causes to clear the DNS cache. These explanations could be related to data privacy, technical issues, or security.
Below, let’s quickly go over each one.
1. To Prevent DNS Spoofing
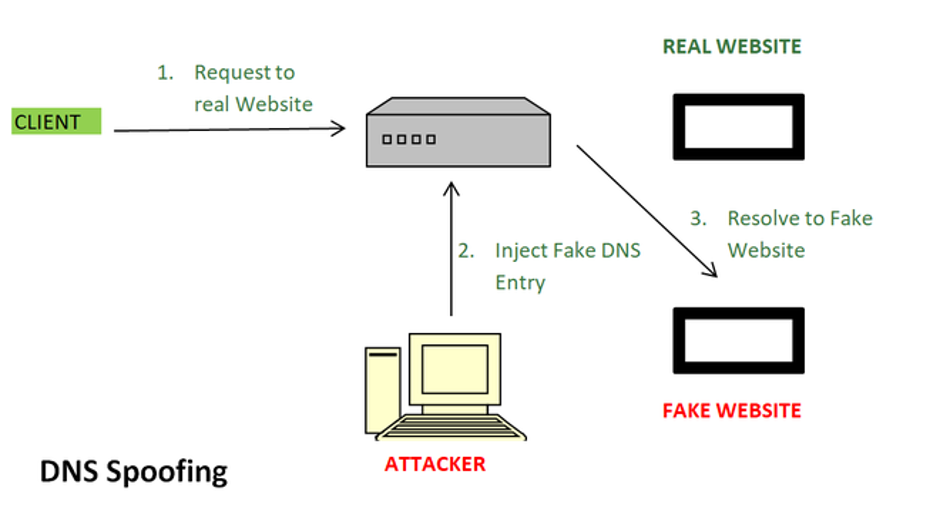
DNS spoofing, sometimes referred to as DNS cache poisoning, is an attack where malicious attackers have access to the DNS cache and modify the data to lead users to incorrect websites.
Sometimes they will send users to a fake website that looks just like the original one to get sensitive data—like online banking login credentials.
2. Users are encountering a 404 Error

Assume for the moment that users have cached the DNS data for a website that has subsequently changed hosts or domain names.
Then, when users try to visit a website, they can get an old version or a 404 error since the DNS information on the machine might not be updated immediately.
Users don’t have to wait for the information to refresh in the DNS cache; it will happen eventually. The DNS cache can be cleared at any time.
3. Having Problem to Access a Website
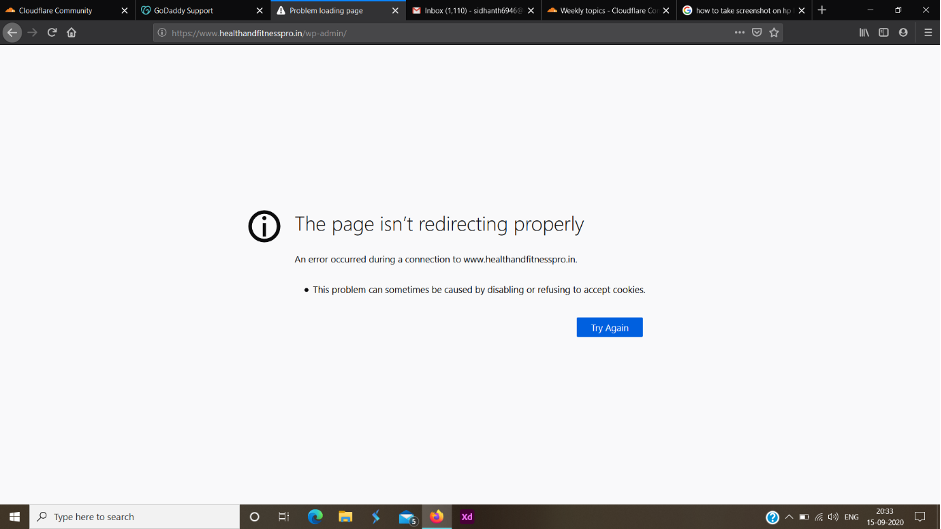
If any website is not loading or showing problems to load, try alternative methods first.
For example, users should delete any temporary files and cookies from their browser and change its settings to disable pop-up ads and let websites to and save read cookies.
However, users can clear their DNS records and submit a fresh request to the server if all other attempts have been unsuccessful.
4. To Keep the Search Behavior Private

When considering user behavior tracking on the internet, majorly the cookies come to mind; nevertheless, the search history can also be accessed through the DNS cache.
This is done so that the DNS cache, which keeps track of the websites users frequently visit, may function as a virtual address book.
It’s a brilliant idea to periodically clear DNS cache to protect this information from online predators and data collectors.
How and Why to Check DNS Updates?
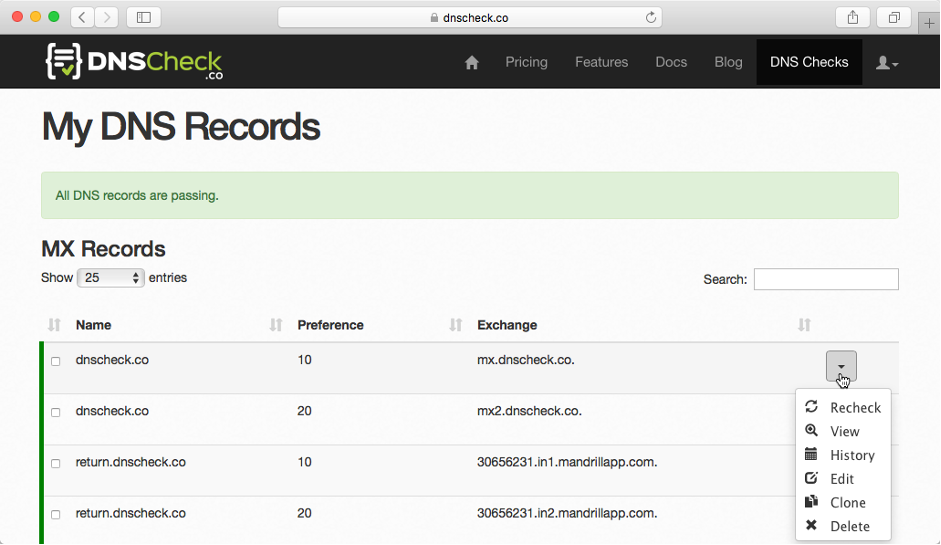
Users will need to adjust their DNS settings to point to the new location when they move their WordPress website to a new server or transfer the domain registration to a fresh domain registrar.
It will take some time for the changes to take effect once users apply them to settings. It can take a few hours or several days to complete. The domain will alternate between pointing to the fresh location and the old one during this period. This is dependent upon the DNS servers, users’ browser uses to get directions and their geographic location.
With internet resources like DNS Checker, users can examine the global distribution of these DNS modifications. Users just need to enter the domain name, and it will retrieve DNS from several global locations.
Difference between the Browser Cache and DNS Cache
Now remember that the caches used by the browser and DNS differ from one another. To speed up page loads on subsequent visits, the browser temporarily stores a large amount of website information in a cache.
Whereas the IP addresses of the websites users visit are contained in the DNS cache, this retains the actual content of the websites they visit.
Users should clear their browser’s cache if they are experiencing problems accessing a page they have updated but are unable to see changes.
1. Steps to Flush the DNS Cache (For Windows)
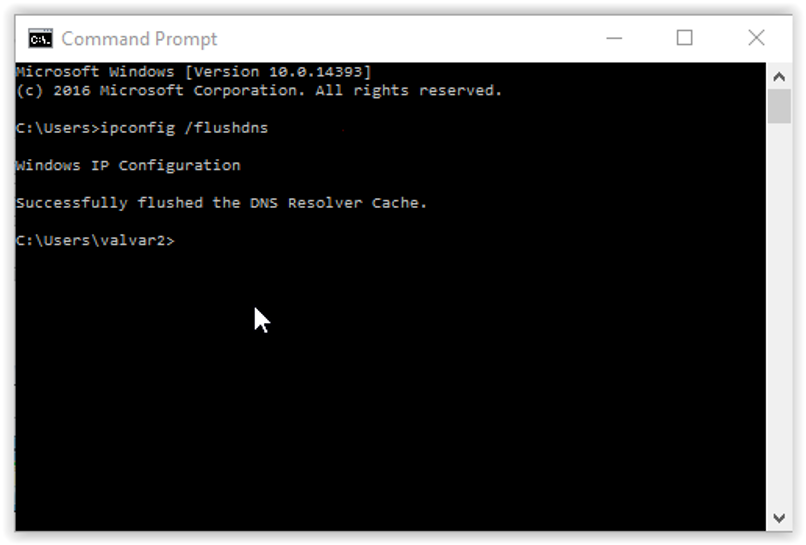
Here’s how to flush a Windows computer’s DNS cache.
- Firstly, users must choose the Command Prompt (CMD) tool by clicking the “Start” button.
- This will open a window with a command prompt. Just type the following text inside of it:
- To perform the command, press the “Enter” key, and Windows will clear the DNS cache.
- That’s all! Users can now go back to their website to retrieve the most recent DNS data.
2. Steps to Flush the DNS Cache (For MacOS)
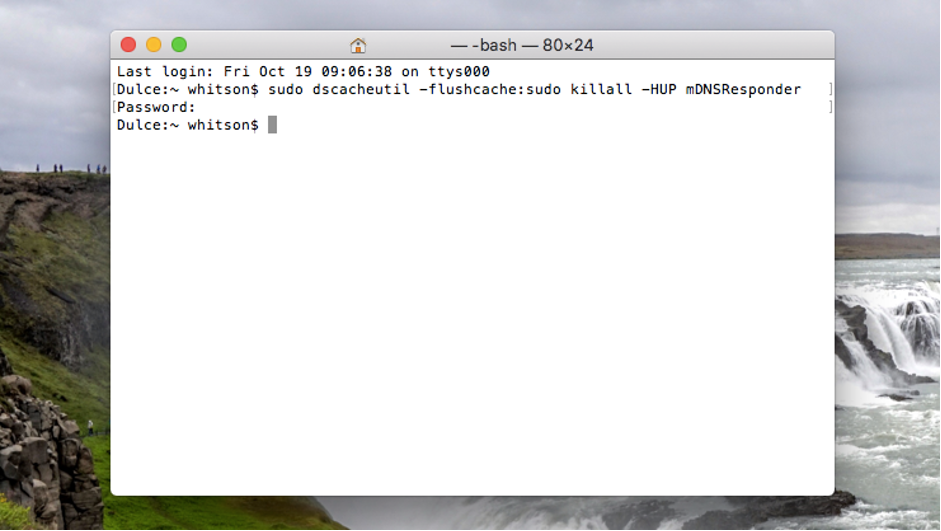
Users can clean their DNS cache on a Mac by following the instructions below.
- Users should first open the Terminal application. It is located in the ‘Other‘ folder of the Launchpad. Another way to open it is to open Finder and then navigate to the Apps » Utilities folder.
- This will open a terminal window. To use it, type the following command in it:
- The password for macOS account should now be entered. Use the same password to access the computer.
- The computer will then clear the DNS cache. To obtain the most recent DNS information, go to the website immediately.
3. Steps to Flush the DNS Cache (For Chrome)
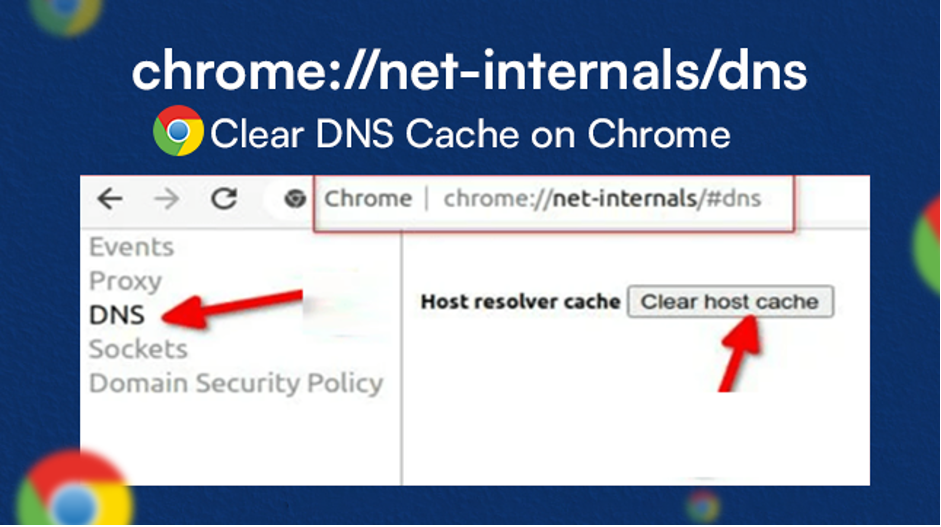
In addition, Google Chrome maintains its own DNS cache, which is kept apart from the operating system’s DNS cache.
Clearing Chrome’s DNS cache is also necessary if users use it as their primary browser.
- First, type the following address into the address bar of the browser and hit “Enter”:
- The Chrome’s net internal settings page will be loaded.
- Chrome will then delete its DNS cache if users click the “Clear host cache” button from this page.
The Bottom Line
Since you have successfully cleared the computer’s DNS cache, remember the process for next time.
Just note that it may take nearly 48 hours for DNS changes to spread to all DNS servers on the internet. It would take a few hours for these modifications to become operative.
Although it may seem difficult to clear DNS cache, there are a number of easy steps that users can perform. Luckily, the process itself is simple.
It just takes a few simple steps to flush the DNS cache. Users must first know the OS and version that they are running.
After that, they can execute one or two quick instructions to clear DNS cache and proceed as per the pertinent steps above.
Frequently Asked Questions
1. Why to Flush DNS Cache?
Although a DNS cache advances the DNS lookup process, which speeds up the loading of web pages.
Sometimes, cleaning the cache can improve security and performance by making it easier to troubleshoot DNS errors, guaranteeing that the RR in the local cache are current, and guarding against DNS cache spoofing and poisoning.
2. How to Flush DNS Cache on Windows?
- Use the Command Prompt to clear Windows’ DNS cache.
- Type “run” by pressing the Windows key and then hit the Enter key.
- Type “cmd” into the Run space bar that appears, then click OK.
- Type “
ipconfig /flushdns
3. How to Flush DNS Cache on Mac?
- On the Mac, the DNS cache can be cleared using the integrated Terminal application.
- Navigate to Utilities.
- Double-click Terminal to open it from the Utilities appearing window.
- Type “
sudo killall -HUP mDNSResponder - The password should be entered. To clear the DNS cache, input the password and hit Enter on the keyboard.
4. How to Flush DNS Cache on Google Chrome?
- Chrome’s DNS cache can be cleared from the browser itself.
- To access Chrome, open the address bar, type “
chrome://net-internals/#dns - To clear the DNS cache, select the Clear host cache tab on the appearing page.
5. How often should DNS Cache Be Cleared?
Users can easily clean their DNS cache as often as they wish to; the process takes about 15 minutes with no harmful effects.
To minimize vulnerabilities and preserve optimal performance, it is advised to flush the DNS cache as often as is convenient and as needed to handle the issues.