Google Chrome is widely used and trusted by many, but like any software, it can run into issues from time to time. One of these common problems is the ‘ERR_CACHE_MISS’ error message.
If you’ve seen this message, you might also be prompted to re-enter or submit some information. While it can be frustrating, the good news is that this error is entirely fixable.
There are several simple methods you can try to resolve this error and get back to the website you’re trying to visit.
In this article, we’ll explain what ‘ERR_CACHE_MISS’ means, go over some of its usual causes, and then guide you through a few methods to fix it.
Let’s start and solve this problem together!
Understanding the “ERR_CACHE_MISS” Error
Ever come across a weird message on Chrome that says “ERR_CACHE_MISS”? It basically means Chrome is having trouble finding something it needs to show you a website. This can happen for a few reasons:
- Maybe Chrome can’t find the things it saved from websites you visit often (like pictures or bits of code).
- There might be a bug in Chrome itself, your settings, or the extra tools you use on Chrome (called extensions).
- The website you’re trying to visit might have its problems.
- If you’re a developer (someone who builds websites), this message might pop up if you’re using the wrong tools to test your website.
This error message is most common in Chrome, but some people using Firefox might see something similar that says “Document Expired.”
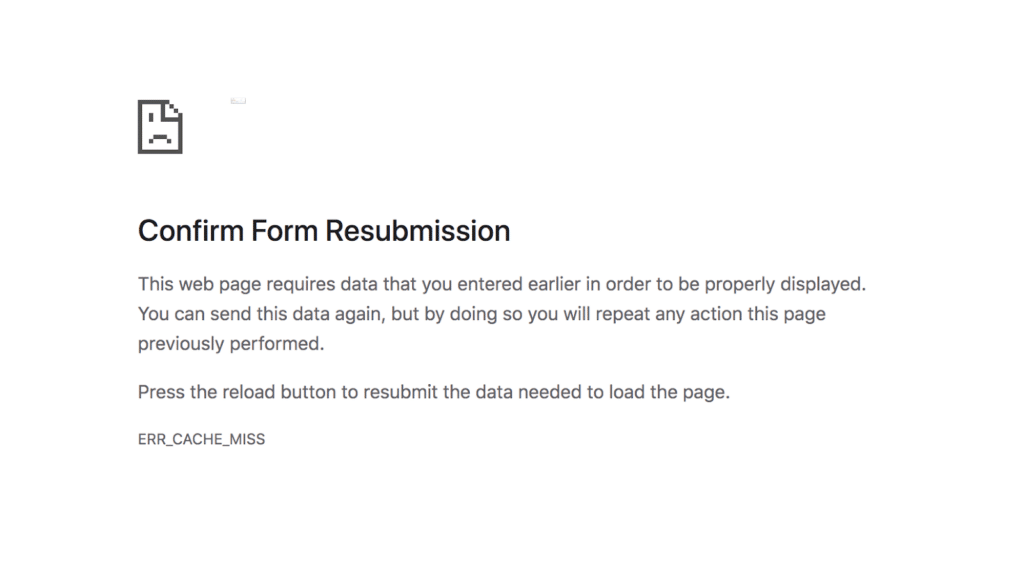
You might also see a message asking you to confirm if you want to resubmit a form. This usually happens if you’re filling out a form on a website and you keep clicking the back or forward buttons too quickly.
7 Proven Methods to Fix the “ERR_CACHE_MISS” Error
Now that you understand the potential reasons behind the “ERR_CACHE_MISS” error, let’s explore the solutions! Here are seven methods you can try, starting with the simplest:
- Refresh the Page (A Simple Fix):
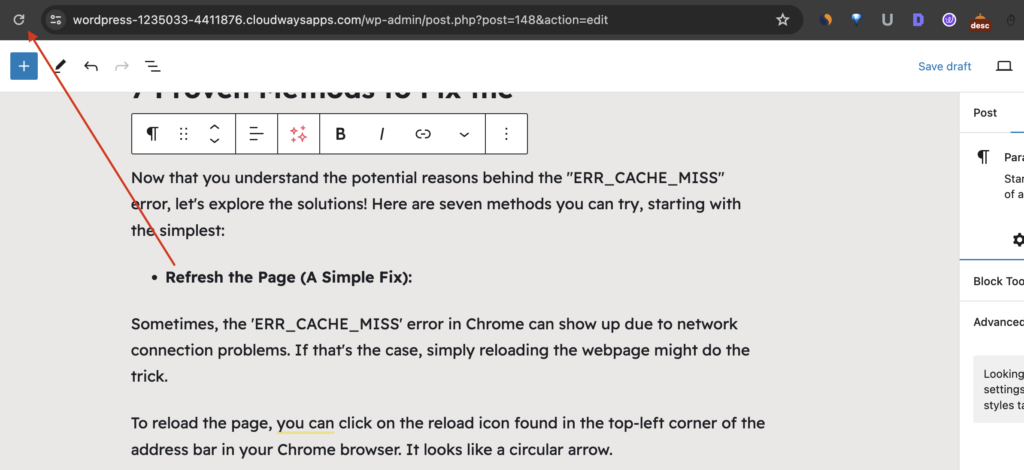
Sometimes, the ‘ERR_CACHE_MISS’ error in Chrome can show up due to network connection problems. If that’s the case, simply reloading the webpage might do the trick.
To reload the page, you can click on the reload icon found in the top-left corner of the address bar in your Chrome browser. It looks like a circular arrow.
Another way to reload the page is by pressing the F5 key on your keyboard.
If you’ve reloaded the page but still see the error message, it means the network wasn’t the problem. In that case, it’s time to try the next method.
- Update Your Chrome Browser (Ensuring Compatibility):
Using an outdated version of Chrome can lead to various problems, including caching errors. Head to Chrome’s settings and check for updates.
If you’re using an older version of Chrome, it’s a good idea to upgrade to the latest one. This can fix any compatibility problems or inefficiencies that could be causing the ‘ERR_CACHE_MISS’ error message.
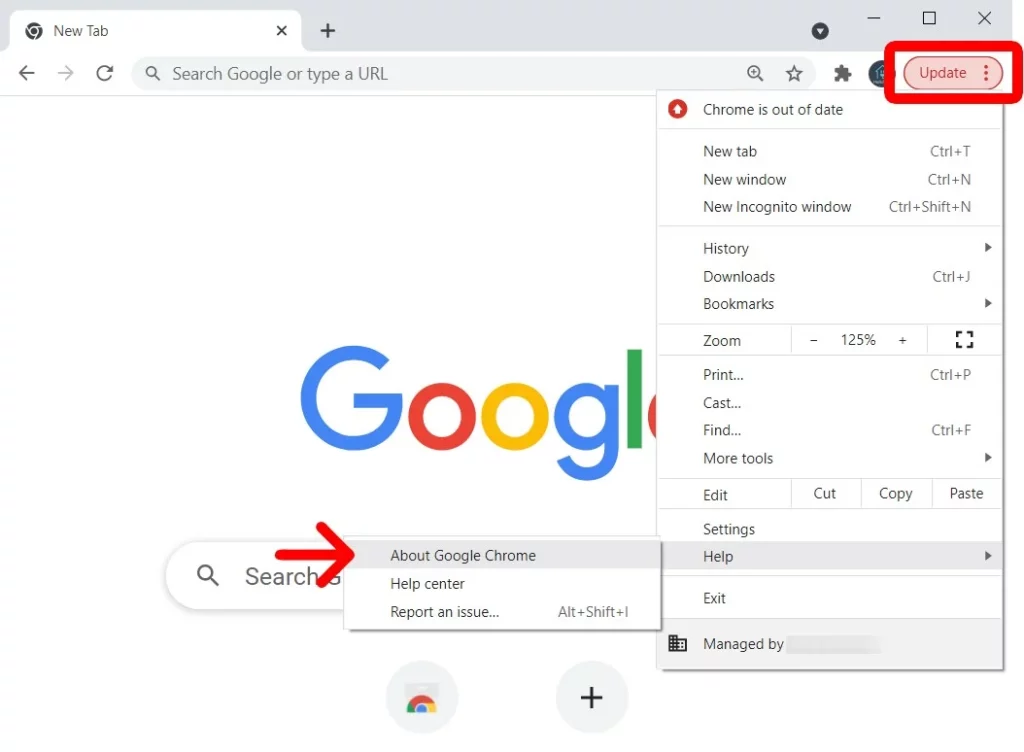
To update your browser, open a new Chrome window and go to Settings. You can find Settings by clicking on the three vertical dots in the top-right corner, and then selecting “Settings.”
In the Settings menu, choose “About Chrome.” Here, you’ll see if you’re using the latest version of the browser. If not, you’ll see an option to “Update Chrome.”
Just follow the prompts to update your browser, then restart it and try accessing the webpage again. This should hopefully resolve the issue.
- Clear Your Browser Data (Clean Your Cache):
If your browser has collected corrupted files in its cache, it could be causing the error message you’re seeing. So, the next thing you should try to fix the problem is to clear your browser data.
Clearing your browsing data, including cached images and files, gives Chrome a clean slate and potentially resolves the error.
Here’s a step-by-step guide on how to clear your browsing data in Chrome:
- Open Chrome and click on the three vertical dots in the top right corner.
- Select “Settings” from the dropdown menu.
- Scroll down and click on “Privacy and security.“
- Under “Clear browsing data,” choose a time range (e.g., “All time”).
- Make sure the checkbox next to “Cached images and files” is selected.
- Click on “Clear data” and wait for the process to complete.
- Disable Browser Extensions (Identify the Problem):
Another potential issue that may be causing the ‘ERR_CACHE_MISS’ error is that one of the extensions you have installed is corrupted, or is interfering with Chrome’s ability to connect to and load the web page.
If you think one of them might be causing the problem, you can try turning them off one by one. Here’s a detailed breakdown of this method:
- Identify Suspects: Some extensions are more likely to interfere with caching than others. Ad blockers, privacy protectors, and security extensions can sometimes be a problem. Make a mental note of any recently installed extensions or ones that modify your browsing experience.
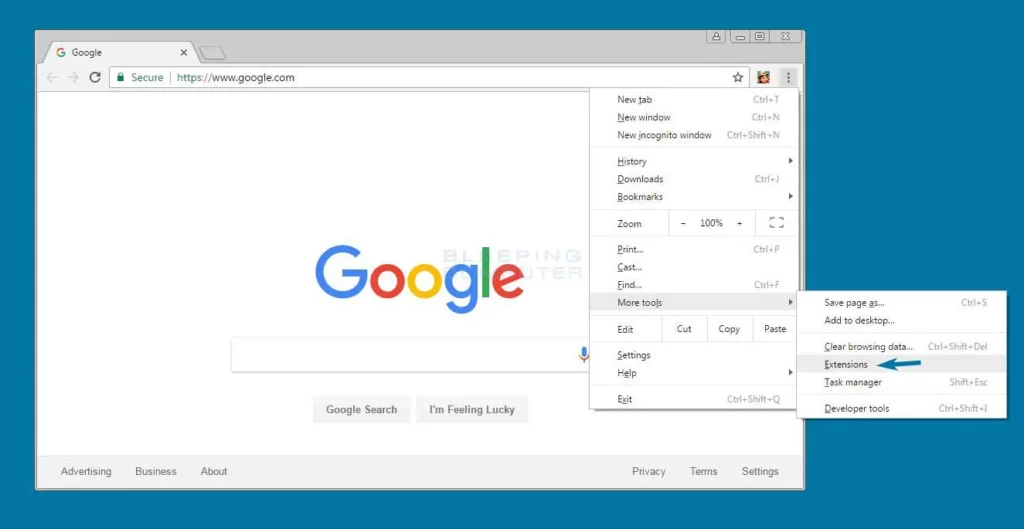
- Disable and Test: Open Chrome’s settings menu (three vertical dots) and select “More tools” followed by “Extensions.” You’ll see a list of all your installed extensions. Start by disabling one extension at a time, preferably beginning with those you suspect might be causing issues.
After disabling an extension, try accessing the website that displayed the “ERR_CACHE_MISS” error. If the error disappears, you’ve likely identified the problem.
- Remove the extension: Once you’ve identified the problematic extension, you can choose to keep it disabled or remove it altogether. If you decide to remove it, click on the trash can icon next to the extension’s name in the Extensions menu.
Remember: If you disable any extensions, it could change how certain features work on your browser. You might want to try out different extensions or Before you turn off the extension completely, try changing its settings to see if that helps fix the problem.
- Reset Your Network Settings (A Network Refresh):
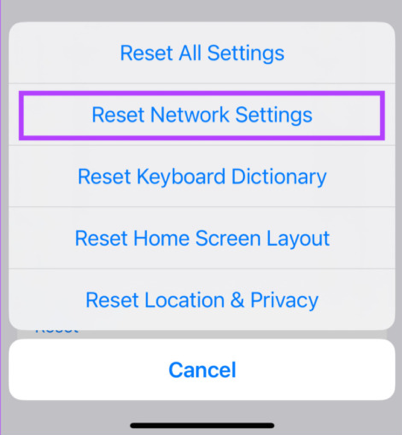
Network settings can sometimes get out of sync, leading to connection issues that might impact caching. Resetting your network settings can help Chrome re-establish a clean connection and potentially fix the caching problem.
Here’s a breakdown of how to reset network settings on Windows and macOS:
Windows:
- Open the Command Prompt window by searching for “cmd” in the Start menu and selecting “Run as administrator.“
- Type the following commands one by one, pressing Enter after each line:
- ipconfig /release
- ipconfig /all
- ipconfig /flushdns
- ipconfig /renew
- netsh int ip set dns
- netsh winsock reset
- Restart your computer for the changes to take effect.
macOS:
- Open the Terminal app by navigating to Finder > Applications > Utilities.
- In the Terminal window, type the following commands one by one, pressing Enter after each line:
- dscacheutil -flushcache
- sudo killall -HUP mDNSResponder
- Restart your computer for the changes to take effect.
Important Note: Resetting network settings might erase saved Wi-Fi passwords and other network configurations. Make sure you have these details handy before proceeding.
- Reset Your Browser Settings (A Fresh Start):
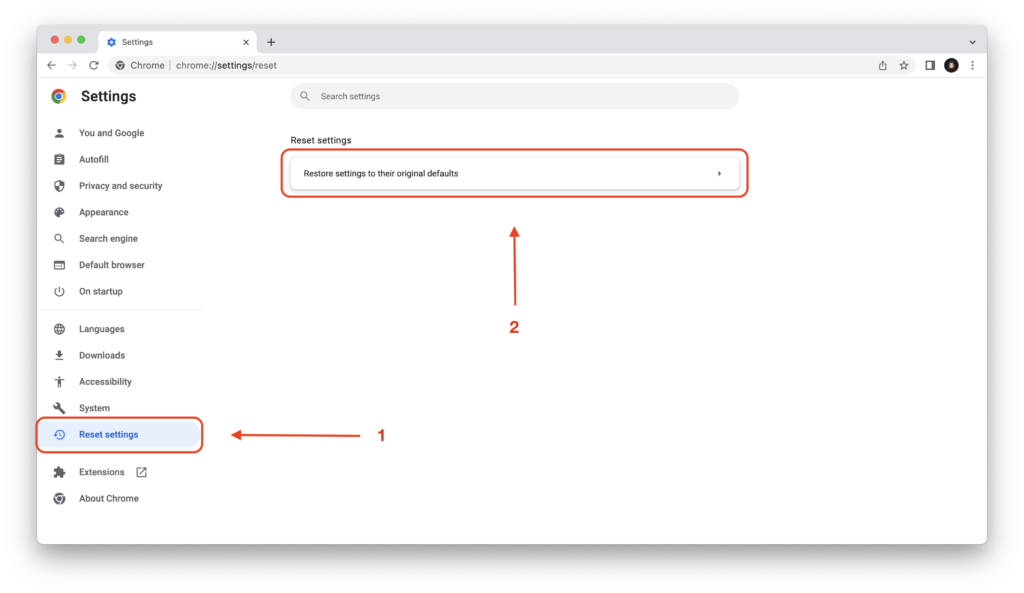
If none of the above methods work, consider resetting your Chrome settings. This will restore them to their defaults, potentially resolving any configuration issues impacting the cache.
Here’s how to reset your browser settings in Chrome:
- Open Chrome settings and navigate to “Advanced.”
- Click on “Reset settings” and then confirm by clicking “Reset.”
Remember: Resetting browser settings will also disable all extensions and clear browsing data (including bookmarks and history) if you don’t choose to preserve them during the process.
- Disable Your Cache System
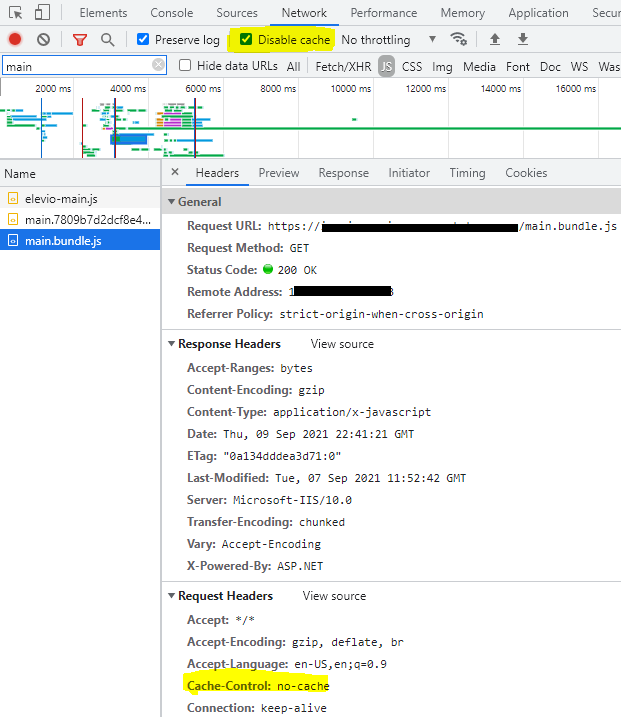
This is a less common solution, but if all else fails, you can try temporarily disabling Chrome’s caching system using the Developer Tools. However, keep in mind that this will slow down your browsing experience on some websites, especially those you haven’t visited before.
Here’s how to disable the cache system in Chrome:
- Open Chrome DevTools by right-clicking anywhere on the web page and selecting “Inspect” or pressing F12.
- Navigate to the “Network” tab.
- Check the box next to “Disable cache.”
- Refresh the webpage.
Remember: Disabling the cache is a temporary solution and will revert to normal settings when you close and reopen Chrome.
The Bottom Line
If you follow these steps and understand why each one is important, you should be ready to fix the “ERR_CACHE_MISS” error and have a smooth time using Google Chrome again. Just remember, a bit of problem-solving can make a big difference in making sure your browsing goes well!
Bonus Tip: If you’ve tried everything and the error keeps popping up, it could be the website’s fault. Wait a while and try again later, or let the website owner know about the problem. Also, searching online for the error message along with the website’s name might help you find fixes from others who’ve had the same problem.
As we discussed in this article, there are seven methods you can use to resolve the ‘ERR_CACHE_MISS’ error in Chrome:
- Reload the page.
- Update your browser.
- Clear your browser data.
- Disable your browser extensions.
- Reset your network settings.
- Reset your browser settings.
- Disable your cache system.